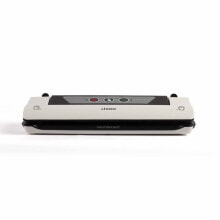
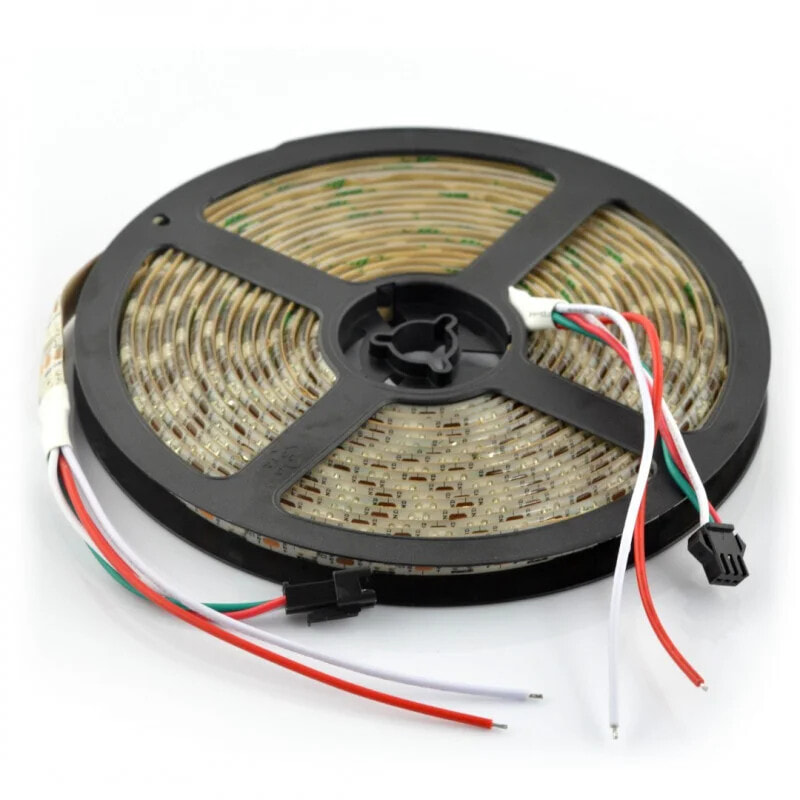
RGB LED Bar WS2811 - digital, addressable - IP65 30 LED/m, 7.2W/m, 12V - 5m
- Product Code:
- 47399059
Properties
- Led Lens
- Четкий
- Voltage To
- 12.0 V
- Voltage From
- 12.0 V
- Класс герметичности
- IP65
- Светодиодно - цифровой
- yes
- Светодиодный - цветной
- RGB
Basic information
- Rated power
- 7.2 W
General characteristics
- LED - светодиоды
- 30 per meter
Other features
- Brand
- OEM
Performance
- Cable length
- 5.0 m
Power
- Rated voltage
- 12 V
Description
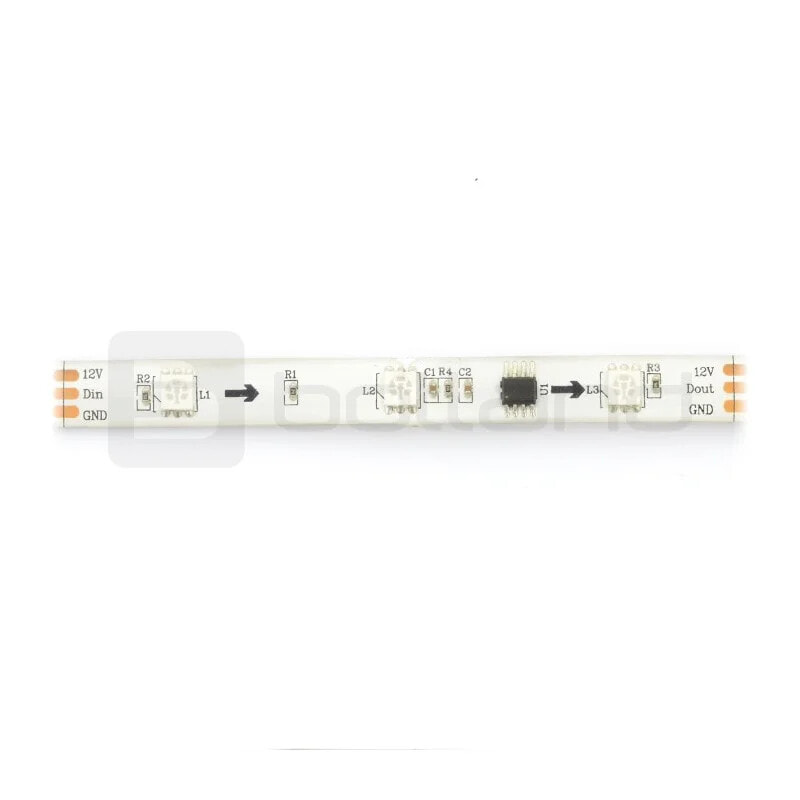
Individually addressable RGB LEDs located in a 5 m bar with a density of 30 diodes per meter. Each pixel consists of three RGB LEDs can emit a color from 24-bit palette. To control the module, one microcontroller's pin. (for example,Arduino).
The bar has addressed groups of LEDs. One controller is on 3 led.
The LEDs are arranged densely, at a distance of about. 34 mm, because of this, the brightness is high. The system is supplied with the voltage of 12 V, consumes app. 0.6 A per each meter (7.2 W). The chain has the possibility of crossing every third diode.
The used communication protocol allows the serial connection of the LEDs. Another chain should be connected to the output connector, connecting appropriately 12V, GND and DOUT with DIN. The manufacturer notes that when working with more than 500 LEDs, may not be enough RAM in the system the Arduino Uno. You should also note that every following matrix will require increasing of the productivity power.
Connection
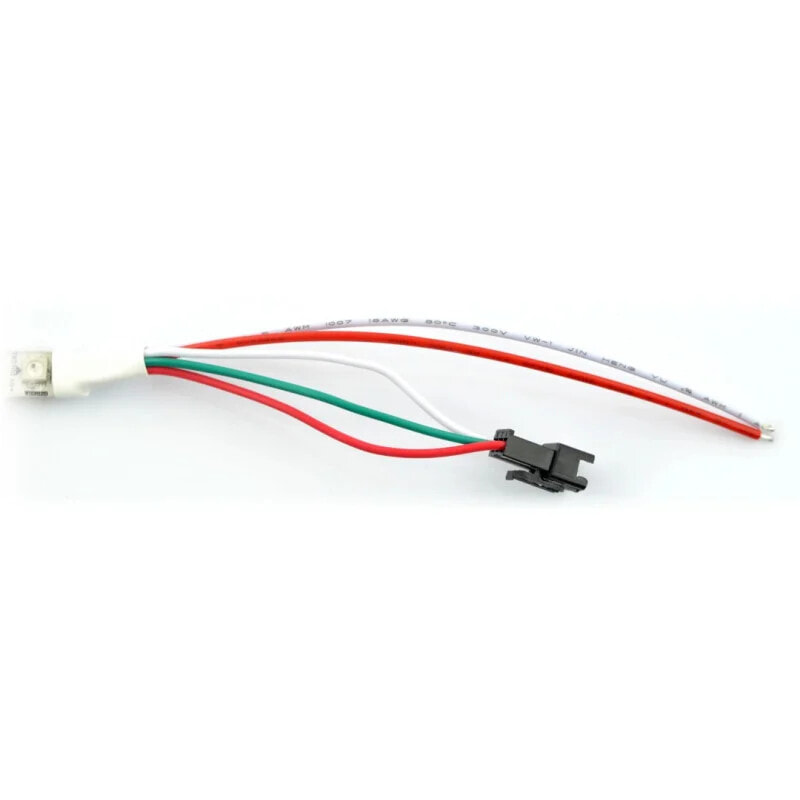
The device has a 3-pin connector consisting of the following leads:
- GND (white wire)- module weight
- 12V (red wire)- voltage supply, for one matrix you should connect the source with the output current not less than 1.0 A for each meter of chain
- DIN (green wire)- digital control signal from the microcontroller
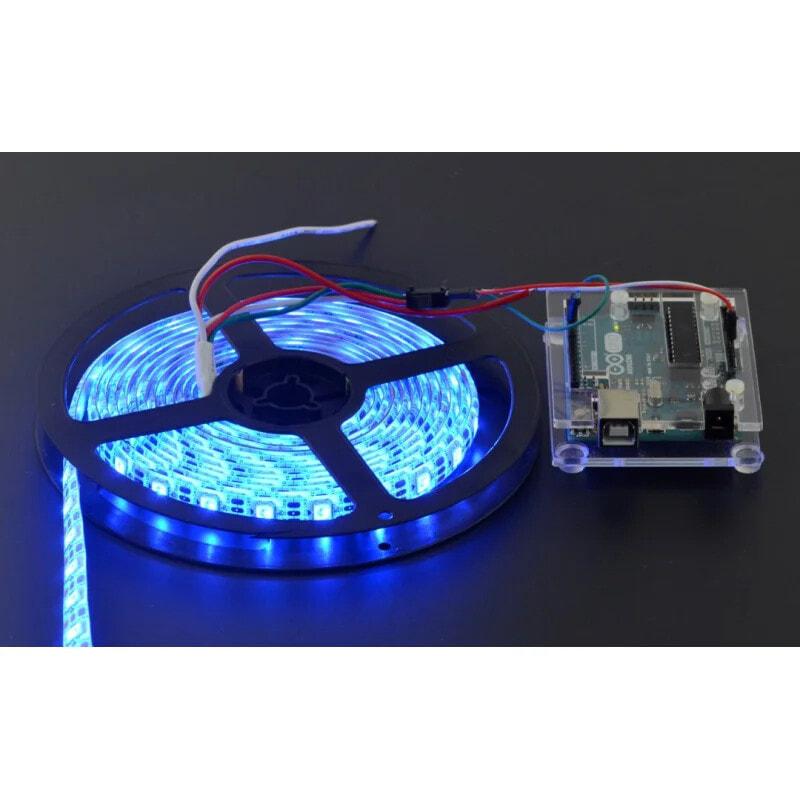
The product is compatible with Arduino and Raspberry Pi
- The Arduino library in GitHubfor modules NeoPixel along withthe connection examples,
- exampleofconnectionwith a Raspberry Pi along with the code.
Installation of the Adafruit library for Arduino:
- Download the library fromthe website GtitHubby clicking the buttonDownload ZIP
- Unzip the downloaded ZIP file, the result should be the folder that contains the files: Adafruit_NeoPixel.cpp That Adafruit_NeoPixel.h and other subfolders
- Rename the main folder to: Adafruit_NeoPixel
- Move the entire folder to the directory that contains the Arduino library, by default, it should be on the path: /Documents/Arduino/Libraries
- Start the Arduino again, the library will appear in the Menu: File -> Examples
First run - example simple
- Run the test program by choosing in the Arduino environment:
- File -> Examples -> Adafruit_Neopixel -> simple
- Select the pin which will control the LEDs. By default, it is the pin 6:
- Line 11#define PIN 6
- Select the number of pixels that must be controlled. By default, it is 16:
-
- Line 14#define NUMPIXELS 16
- Upload a program into Arduino. Pixels should include in order to the amount specified in line 14.
- If you want to change the glow color, enter different values into the function:
- Line 40pixels.setPixelColor(and pixels.Color(0,150,0))In parenthesis are the components of RGB, the maximum value of each is 255
- Change of the speed of the ignition of individual pixels is possible by editing the value:
- Line 21int delayval = 500;
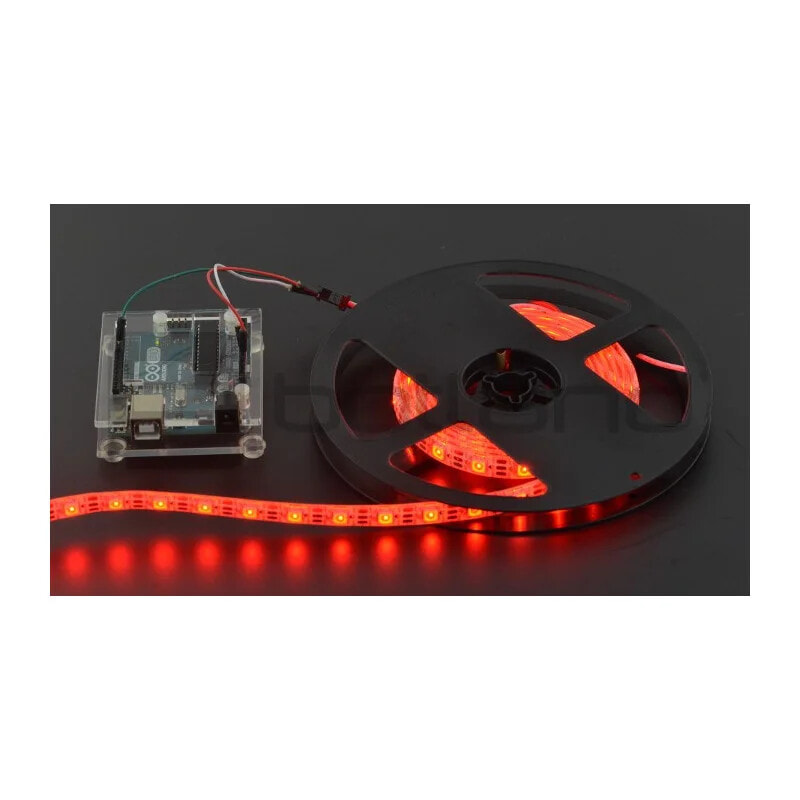
Bar WS2811 LED in combination with anArduino Uno.
Specification- Supply voltage: 12 V
- Power: 7.2 W/m
- Current consumption: 0.6 A at 1 meter of chain for a single diode with color white,
- The LEDs used: LED-RGB-SMD5050 WS2811
- Addressed pixel: 3 leds RGB
- Each pixel consists of three RGB LEDs, can emit a color from 24-bit palette
- Resistance to external conditions: IP65 (silicone cover)
- Bar's width: 10 mm
- Chain length: 5 m
Useful links
- The Arduino library in GitHub
- System Ambilight TV Raspberry Pi + OSMC - dobreprogramy.pl
- Example of connecting to the Raspberry Pi
- User manual in the system Adafruit